On this Page
Using the Book Panel in InDesign
Combining sections and chapters into one book
Introduction
Quite often we will be working with very long publications that will benefit from the concept of separate files for separate sections or chapters. There are also advantages from having individuals in a team, work on different InDesign files (with common styles), and then bring them all together inside one book.
InDesign uses the concept of a ‘book’ that comprises of separate InDesign files; the ‘book’ is a parent file that ‘ties’ together the various individual components.
What is an InDesign Book?
An InDesign book (the file ends in .indb), is nothing without at least 2 InDesign files. You can initiate the book file when you have some InDesign files to place into it, or you can leave this part of the workflow, when you are ready to create the table of contents and output the file for print or digital.
The Style Source
When you create an InDesign book, you are going to combine different files within the same book, and potentially these files will share styles, master pages and colour swatches.
Only one of these InDesign files will become the style source, so you should be advised that there could be a conflict of style names, when you synchronise the book.
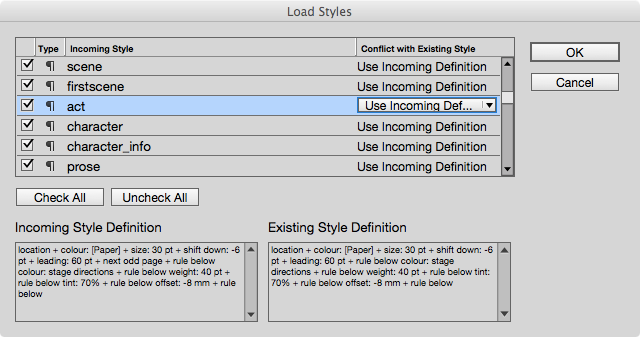
One easy way to remove the risk of loosing some styles in any of the InDesign files, is to load styles from one document into another before you put together in the book. You can do this from the context menu within the paragraph style palette. This will give you a chance to resolve the conflicts and decide which style to keep in the receiving document.
Creating the Book
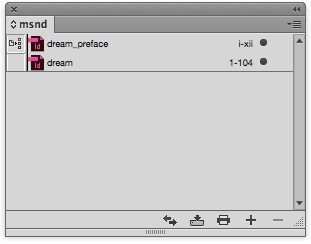
When you start an InDesign Book from the File menu, it is simply empty of content. To add files you can drag and drop onto the panel, or click the + sign and chooses from the finder.
One file will need to be the Style Source and the styles in that document will override the styles built in any other documents. Once you have decided on the Style Source, only the styles changed there will matter to the whole book.
More About the Style Source
If you need to change a style that is only in one particular section of the book, then you can change the Style Source to that file just while you make the change to the style (so you can see what you are doing). All styles should be present in the Style Source, but you may need to move the Style Source to help you when you get a visual handle on the style in question.
In my example, the Play includes a verseline paragraph style that is not used in dream_preface (the Style Source), so I need to change the Style Source to the play (dream), temporarily.
Page Numbers
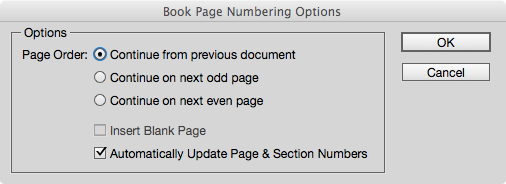
Of course you are presuming that InDesign will take care of page numbers throughout the book. You would be correct, and you will find that you can customise the way the page numbers continue.
Synchronise Options
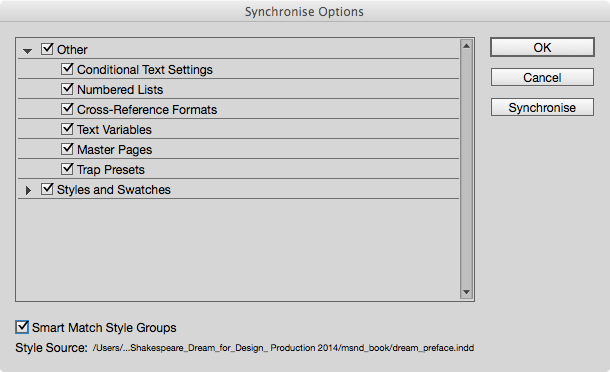
When the InDesign files are synchronised through the Book Panel context menu, there are many features that can be combined and you can choose which aspects to synchronise and which to keep within the separate book files.
How much you change here depends on how important it is for you to maintain consistency throughout the book. As you can see from the Options panel above it would be possible to switch off paragraph and character styles during the synchronising procedure. However, it would be better to maintain consistency throughout the book, and just keep the styles attached to the Style Source.

Master Pages
Master Pages (that use the same name) are prioritised from the Style Source document. This is true unless you turn this off in the Synchronise Options.
The Table of Contents
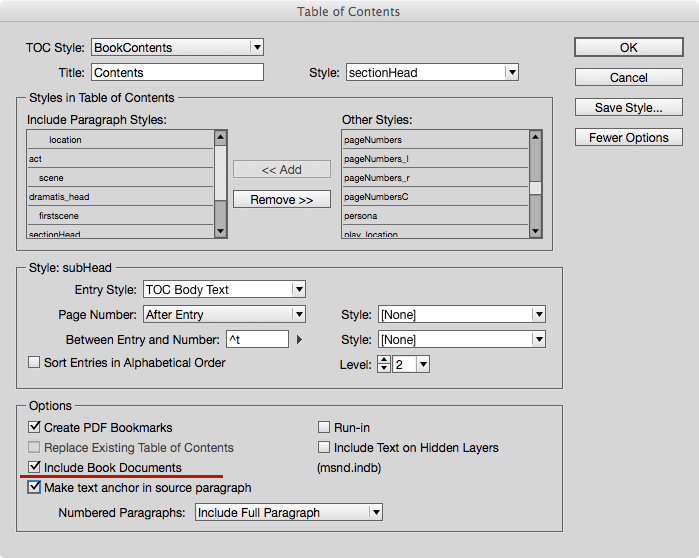
Building the TOC can happen in a new InDesign file, that uses the same page size as the other files in the book — or you can simply add to the first page of the frontmatter.
When creating the table of contents (menu>Layout>Table of Contents), be sure to select ‘Include Book Documents’
Editing individual files
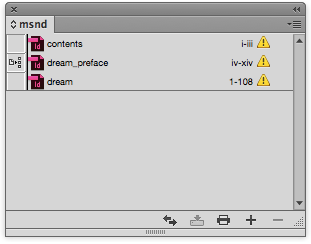
One advantage of the book method of working, is that you can divide long books into individual chapters or sections and work on them independently. If you are working in a team, then individuals can save their own workflows and then bring together later.
If individual files are changed outside of the book environment, then a warning will appear alongside the file in the book panel. Opening the InDesign file, will remove this warning icon.
Pages and Spreads
When you combine InDesign documents into a single book, the relationship between the pages at the point of joining may need to change. A single InDesign document that is intended as a double page spread will always start with a single page. If the number of pages is an even number then it will also end with a single page.
If this document is part of an InDesign book, and you add a file before this existing one, then different things will happen, depending on the number of pages in the new document.
If the number is even, then it will end with a single page. In this situation the pages will ‘dovetail’ and no pages will be added to the second document in the book panel.
If, on the other hand, the incoming document has an odd number of pages (and, therefore ends with 2 pages in a spread), then the existing document will have pages add so as to start on a double page spread.
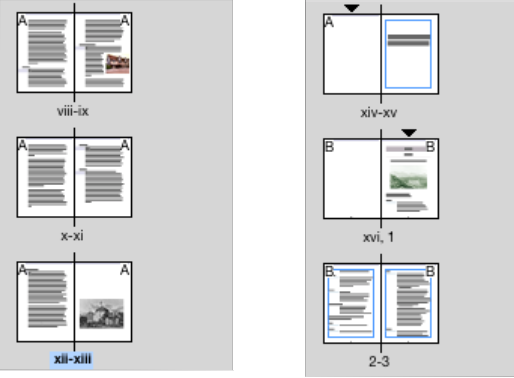
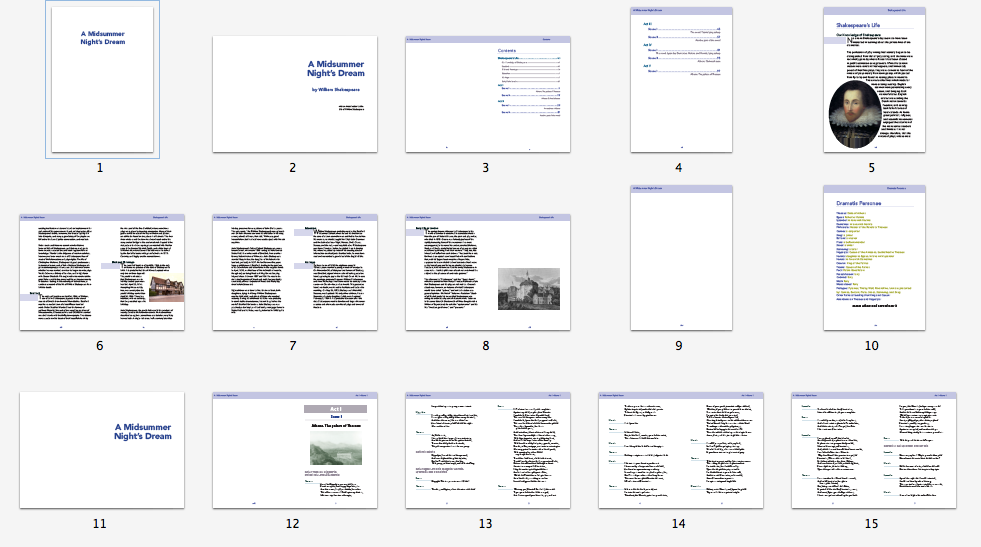
This image shows the last pages in the Preface and the first pages in the main text.
You can see from these thumbnail pages that when combined there will be a fit of the end to the beginning.
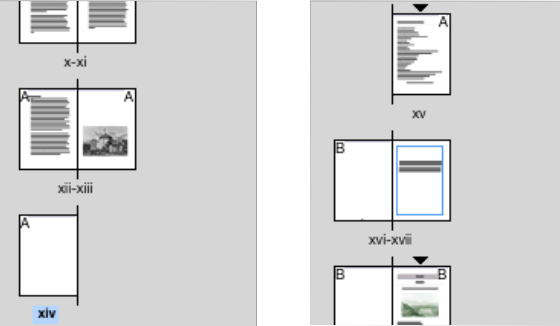
If we do not have the final page in the preface (this is a blank page), then we will get the following:
The end of the Preface has 2 pages side-by-side. The beginning of the Main text also must start with a double page spread. When documents are combined in a book panel, then you may get some changes to the pagination and you may need to reorganise the content appropriately. Page Numbering and ordering of Pages You will notice from the images above, that we have different page numbers for the Front Matter, to the rest of the book.
The order of sections and the way they are numbered follows certain conventions in book publishing.
What follows is the way we can number the pages in our example Shakespeare Play book.
First point: all pages after the endpapers are counted, whether or not the page numbers are displayed. The half-title page would be the first to be counted.
Second Point: The usual way to number Front Matter pages is to use lower case Roman numerals (i,ii,iii,iv). The Foreword and Table of Contents is part of the Front Matter. Our Life of Shakespeare text is probably, part of the front matter, because it is NOT about the play, but supplementary to it.
The Dramatis Personae (the list of characters) is often included in the front matter, but, again, you may see this differently in some editions.
Third Point: The play should be numbered from page 1 in Arabic numerals.
Fourth Point: The Table of Contents comes after the copyright page. This means it is likely to be starting on page v. Table of Contents pages are NOT numbered but are counted.
Finally: Your pages are likely to be as follows:
- Half Title (Just the title of the play)(recto)
- Blank or include a frontispiece
- Full Title (Title of the Play, Author, maybe date, and maybe including with a brief Life of Shakespeare - and name of publisher (recto)
- Copyright Page (you can leave blank)
- Table of Contents (starts on recto)
- Life of Shakespeare (or whatever you called it) - (starts on recto)
- Another half-title (recto)
- Dramatis Personae - (starts on recto)
- The Play (starts on recto)
Note: recto means the right hand page when the book spread is open.
How to Number Pages with InDesign Book Panel
If you are trying to figure out how to display page numbers on the pages, then you need to refer to a different section about ‘Master Pages’, since this is where this is explained.
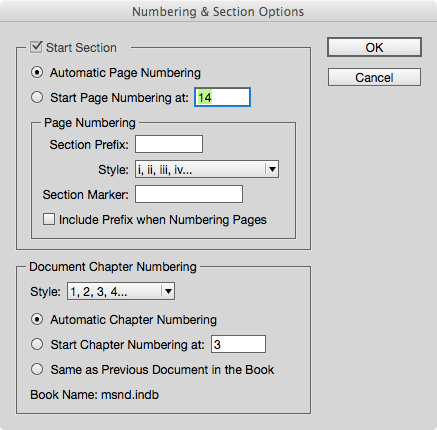
Page numbering is defined in the Numbering & Section Options Panel. This is invoked by Right-Clicking over the thumbnail of the page where you wish to begin a section. In fact every InDesign document has, at least one section. Sections are indicated by the small downwards facing triangle at the top of the thumbnail image. You will see from the following image that this section is numbered automatically but using the lowercase Roman numerals.
At the bottom of this panel you may note that there is a Book Name, showing that the section numbering algorithm is aware that the document is part of a Book.

We can also configure whole book numbering options from the Book panel menu.
Exporting to PDF
When you are ready to export for print, then you should do this through the book panel context menu > Export Book to PDF. You will only see this item on the menu, if you have either selected all InDesign files in the book panel, or — you have selected none. Note: If you select ‘Spreads’ when exporting to PDF and you have single pages at the beginning or end of the chapters, then those pages will NOT be combined to spreads in the PDF. Printers usually require pages exported as single pages because they will conduct their own ‘imposition’ to put the pages into a printing order and signature.
See also ‘ Preflight and Package for Print and Output to PDF’
Filed under: InDesign, Design and Production
This page last edited on: 2017-12-08