On this Page
Building a Table of Contents in InDesign
The Front Matter pages
The table of contents (TOC) belongs to, what are normally referrer to as, the front matter. We might also refer to them as the prelim pages.
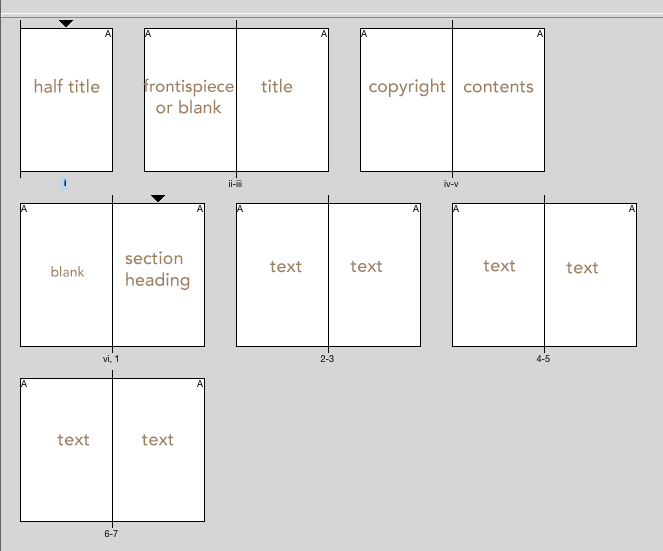
The flat plan seen above shows the pages you need before you create the TOC.
The TOC will follow the copyright page and (for our example) will be accommodated on one page. The main section heading (for us this is The Life of Shakespeare) falls on a recto (right) page, with a blank opposite.
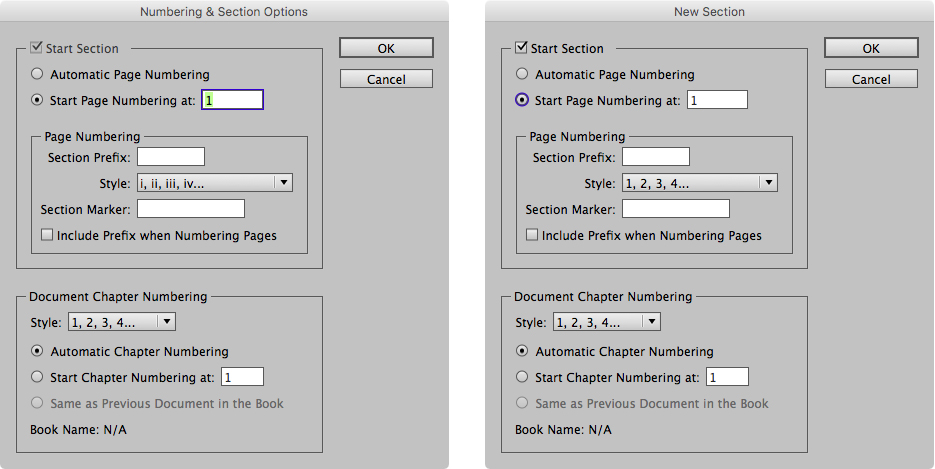
Page Numbers (or folio)
You will find that publishers actually follow a variety of conventions!
Sometimes you might see small roman numerals for the prelim pages with the first text page with a number 1; sometimes you might find no page numbers displayed until the text begins - and then this will be set with a (1) or possible the number of page counted to that point.
In the example here, small roman numerals are used (counting from the half-title) until we reach the first text, where we begin counting with arabic numbers from 1.
Before you Build the TOC
For InDesign to automatically build the table of contents, it is essential that your headings and sub-headings are structured in the correct order and use a specific style set up in the paragraph styles panel.
It is is critical that you do not use these heading styles anywhere else other than in the correct place as actual headings. Do not be tempted to select a heading style for some other text within your document.
What does Automating Mean?
InDesign can place your table of contents (TOC) anywhere that you choose, and as you add content or change the text formatting within your pages, so the TOC will expand and add the correct page numbers (when you tell it to do so). Where to Place the TOC?
The table of contents will usually be near front of the book, so you may need to add some pages before your other content. In a print book the table of contents comes after the front matter such as the half-title, dedication and copyright page. It should be before the preface, foreword and introduction.
Building the TOC
You will find the controls for the Table of Contents under the Layout > Table of Contents menu.
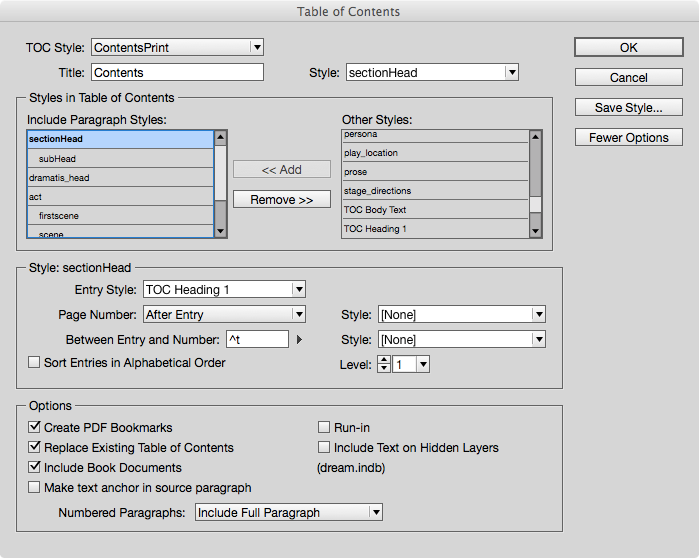
Make sure that you have switched on ‘More Options’ in this panel. You will see all of your paragraph styles on the right and you need to select each heading style in turn and add to the left panel. Pay attention to the levels (in this example you see 3 levels).
Styling the TOC items
This can be quite a complex routine, depending on your needs.
You will notice that (by default), the style being used as the entry style is [Same Style]. You, most likely, will need to select a different style. It is very likely that the style used for your headings will be forcing that item to move to the next page. In this scenario, your TOC may never appear, because it will always try to move to the next page for each item.
The default paragraph styles palette will include some TOC styles. You can use these, and then style for your own purpose and document style.
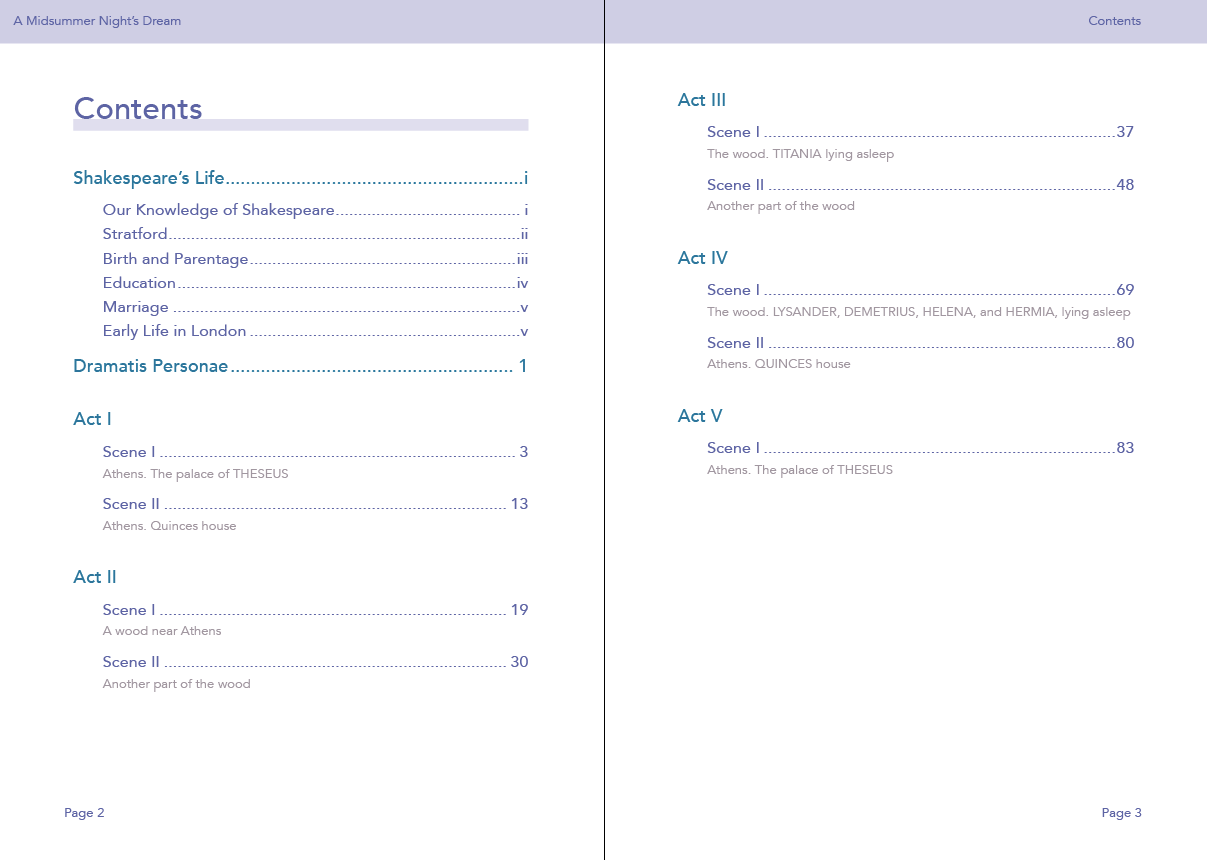
Page Numbers in the TOC
You will want the page numbers to appear within the TOC and how these display is controlled by the paragraph style for the TOC items. In the example here, we have the page numbers appearing far to the right, at the edge of the margin. This is achieved by using the ‘Right Justified’ paragraph style.
Tabs and Repeated Markers It is quite common to put a row of dots between the TOC item and the page number. How do we achieve this?
In the TOC panel (see above), we need to add a TAB between the entry and the page number.
Once we have made sure that the item is followed by a tab, we then need to adjust the paragraph style. Make sure that paragraph style is set to ‘Right-Justify’. For the style (in this case the TOC Body text), we need to adjust the tabs and the repeated leader.
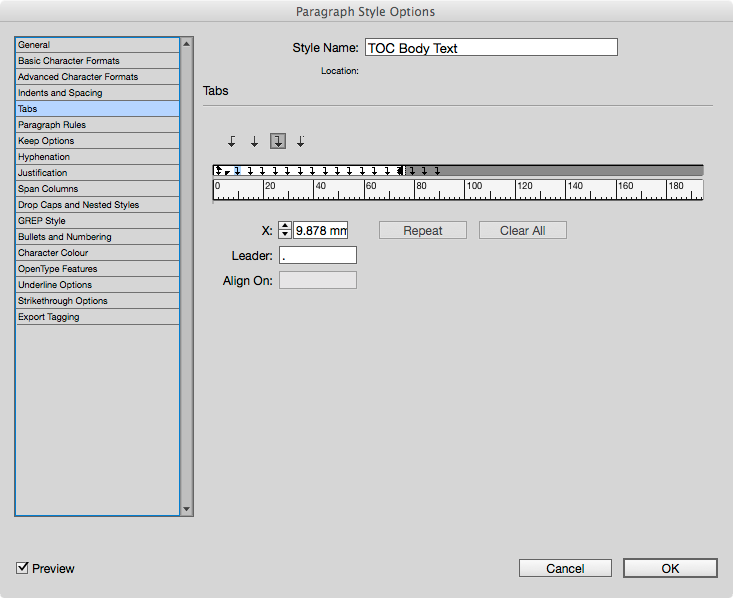
Select the Right Justified tab marker and add the dot as the leader. Click on the ruler and then hit repeat.
Saving the Table of Contents Style
When you are satisfied with your TOC display, you can save this through the Layout>Table of Contents dialogue. Not only does this mean that you can re-use this style and configuration in other documents, but it also offers you the potential to create alternative TOCs for different content.
Other types of Contents tables
You may also create a table of contents for your illustrations, tables and other figures. You will find the location for saving and loading your TOCs from the menu Layout > Table of Contents > Styles.
Interactive Table of Contents
When you create the TOC, you will notice the check box ‘Create PDF Bookmarks’ under the ‘Options’ panel. When selected, an interactive PDF exported from the InDesign file will include the TOC on the page (with hyperlinks to the appropriate page) but also, you can invoke a bookmarks panel in your PDF reader.
Although this a useful feature it is not something that we need for the print output PDF! Here it serves to illustrate the structure of our completed play book.

Note: The information below is for those who intend to deliver eBook versions of their texts.
Creating a Table of Contents for the eBook version
Whichever type of ePub you are making from InDesign, you still have a choice about whether to include the TOC on the page or just within the reader software interface.
Options for the Fixed-layout ePub.
For a fixed-layout ePub, you can leave off the table of contents altogether (not recommended by me), and then the reader software will simply use thumbnails of each page as a navigator. If you do choose to include the generated table of contents on the page, then you certainly should include the page numbers, since those will be matched correctly. A better option may be to have the generated TOC in the file, but not exported on the page.
Options for the Re-flowable ePub.
The re-flowable ePub definitely needs the generated table of contents from InDesign, and this will be used in the reader navigation interface. Optionally, you can include the generated table of contents ‘on the page’, but the page numbers should be removed.
Keeping things simple for pBook and eBook
If your workflow means that you are wanting both print and eBooks from the same file (wouldn’t it be nice?), then you can leave the table of contents on the page with it’s page numbers, but leave it out of the export stage.
I need the table of contents in the pBook version. How do I leave it off the page for the eBook version?
When you build the TOC from Layout>Table of Contents panel, then you should create this as a separate story. It will then be in it’s own text box. With this in mind we can use the Articles panel, to build the structure of our eBook, but leave off the Article that includes the TOC.
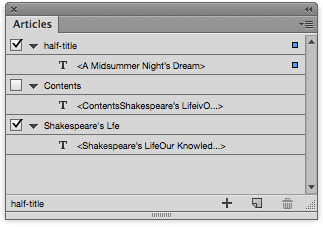
The lack of the tick in the box means that the Article named Contents will not be included on export.
Filed under: InDesign, Typography, ePub, Design and Production
This page last edited on: 2017-06-13