On this Page
Template for a web site and blog using Jekyll and NetlifyCMS
This is a template set up for anyone to begin their own web site. The template is created by Chris Jennings and is based on various Jekyll themes.
Jekyll is a system for building and editing static web sites; meaning that it does not need a database for the content. Content can be added with a simple text language called Markdown. You can explore and learn Markdown here.
Usage
Although the main content is built with markdown and converted to HTML automatically, you won’t need to actually write in markdown, unless you want to. The site is set up to use a content management system (CMS) so that posting new content and setting up the site can be done through a web interface.
Watch the YouTube playlist
You may find it easier to watch the videos that I have made available on YouTube:
Steps to get working with this template
In Github
- Create an account on GitHub
- After creating an account on GitHub, you first need to create new repository by cloning this template:
- https://github.com/publisha/blogbldr
- You will now have a name for the repository and your GitHub username.
-
Keep the GitHub window open in your browser (because we will need to come back to this in a short while)
Netlify is where we build your site
- In another browser tab, go to netlify.com
- Login with your GitHub credentials
- create a
New Site with Git - put in the name of the GitHub repository that you created above.
- Your GitHub repository will be built as a web site with a randomly chosen URL. Something like
wiggly_eel.netlify.app. - Now change the first part of this URL to something that you want. In other words, the wiggly_eel part can change to something that has not been taken (eg: mylifeintext.netlify.app)
- Keep the Netlify window open and do not sign out
GitHub is where the files are located and updated.
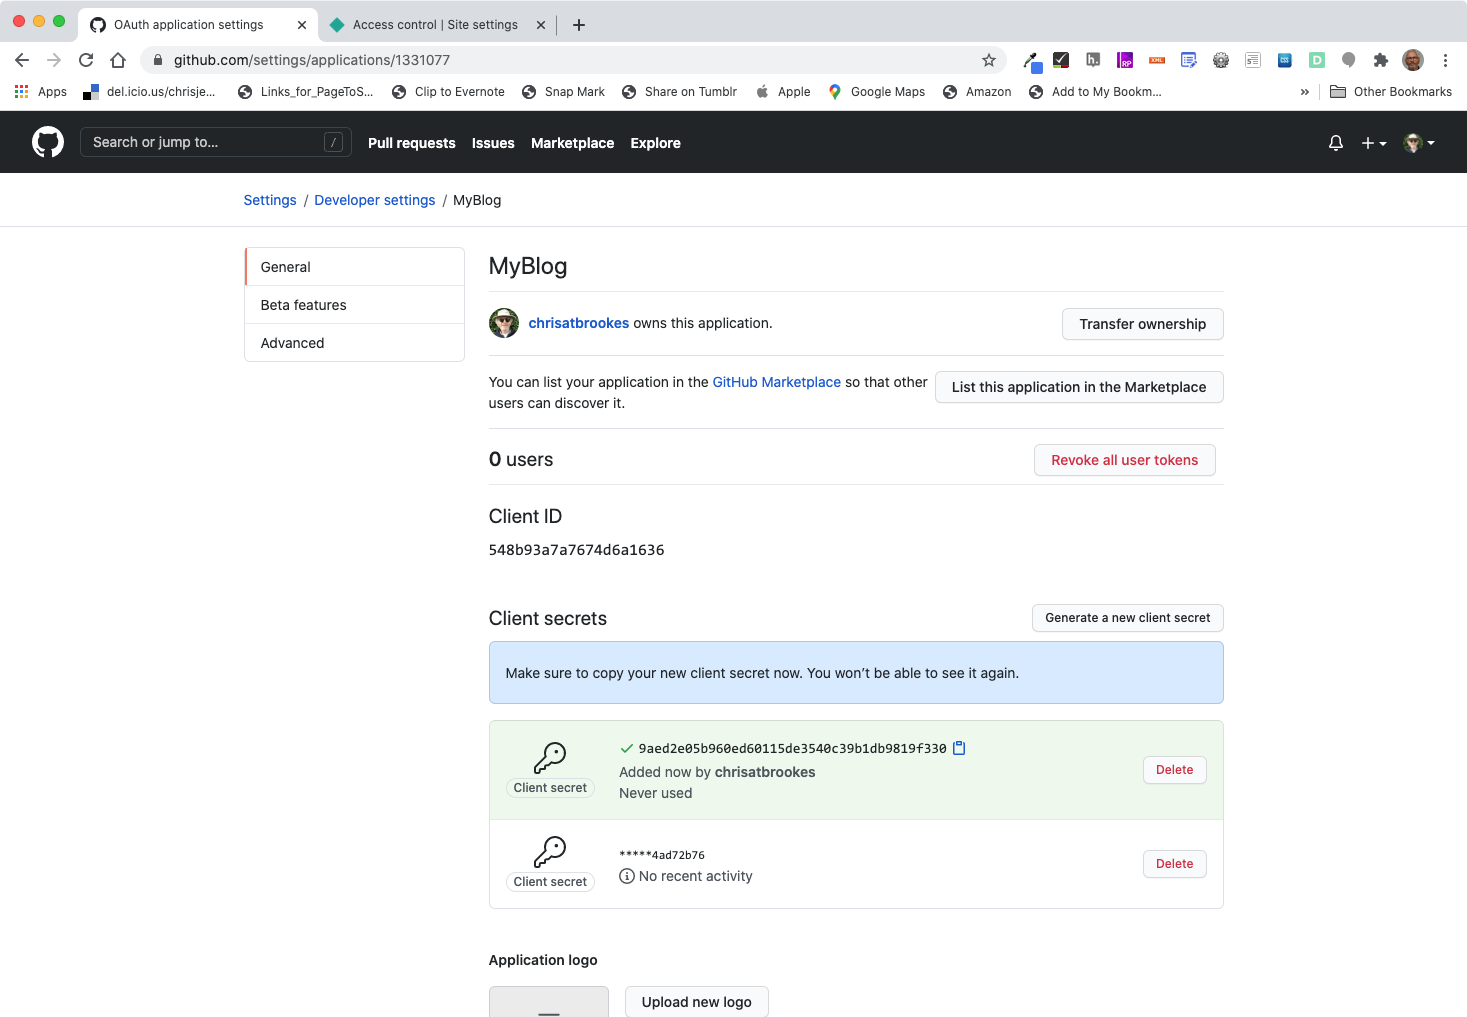
Netlify needs to have permission to take your files from GitHub and build the site every time you make changes. Netlify needs 2 codes - an ID and a secret.
Now in Github, go to your GitHub account and on the left side at the bottom find Developer settings and then see OAuth Apps. In here you need to add a new app and after putting in the details you should be provided with a Client ID and a Client Secret. We need these 2 items in Netlify. Now go back to the Netlify window.
You will also need to enter the callback term in the last box. This should be this:
https://api.netlify.com/auth/done

In Netlify
I hope you can see why I suggested keeping the 2 browser windows / tabs open now.
- Go to Site Settings > Access control > Scroll to the bottom and select OAuth > GitHub.
- Paste in here the 2 codes from GitHub, Client ID and Client Secret. Once you have entered these codes we need to go back to GitHub to make some essential settings so that the system knows about your chosen URL / web site name. So back to the GitHub window then.
Back in Github you can now make some basic edits
You can edit a few settings directly in GitHub so we can begin using the CMS for the other settings. The minimum settings that need changing are in 2 files:
In the Admin folder
In the admin folder find config.yml You need to edit some lines in this file.
1
2
3
4
5
6
7
8
9
10
11
backend:
  name: github
  repo: githubusername/yourrepositoryname # Path to your GitHub repository
  branch: master # Branch to update (master by default)
  site_domain: yoursite.netlify.app #Your site on netlify
  use_graphql: true

publish_mode: editorial_workflow
show_preview_links: true
display_url: https://yoursite.netlify.app
logo_url: https://yoursite.netlify.app/uploads/logo.jpg
Wherever you see yoursite change to the name of your site created on Netlify.
Also on line 3 change the repo path. This will be the GitHub username followed by your repository name.
In the root of the code list
Next look for the file called _config.yml. In this file you need to edit The URL by changing yoursite again, and the repository username and repository name.
1
2
url: "https://yoursite.netlify.app"
repository: yourusername/yourrepository
Using the CMS to add more Settings
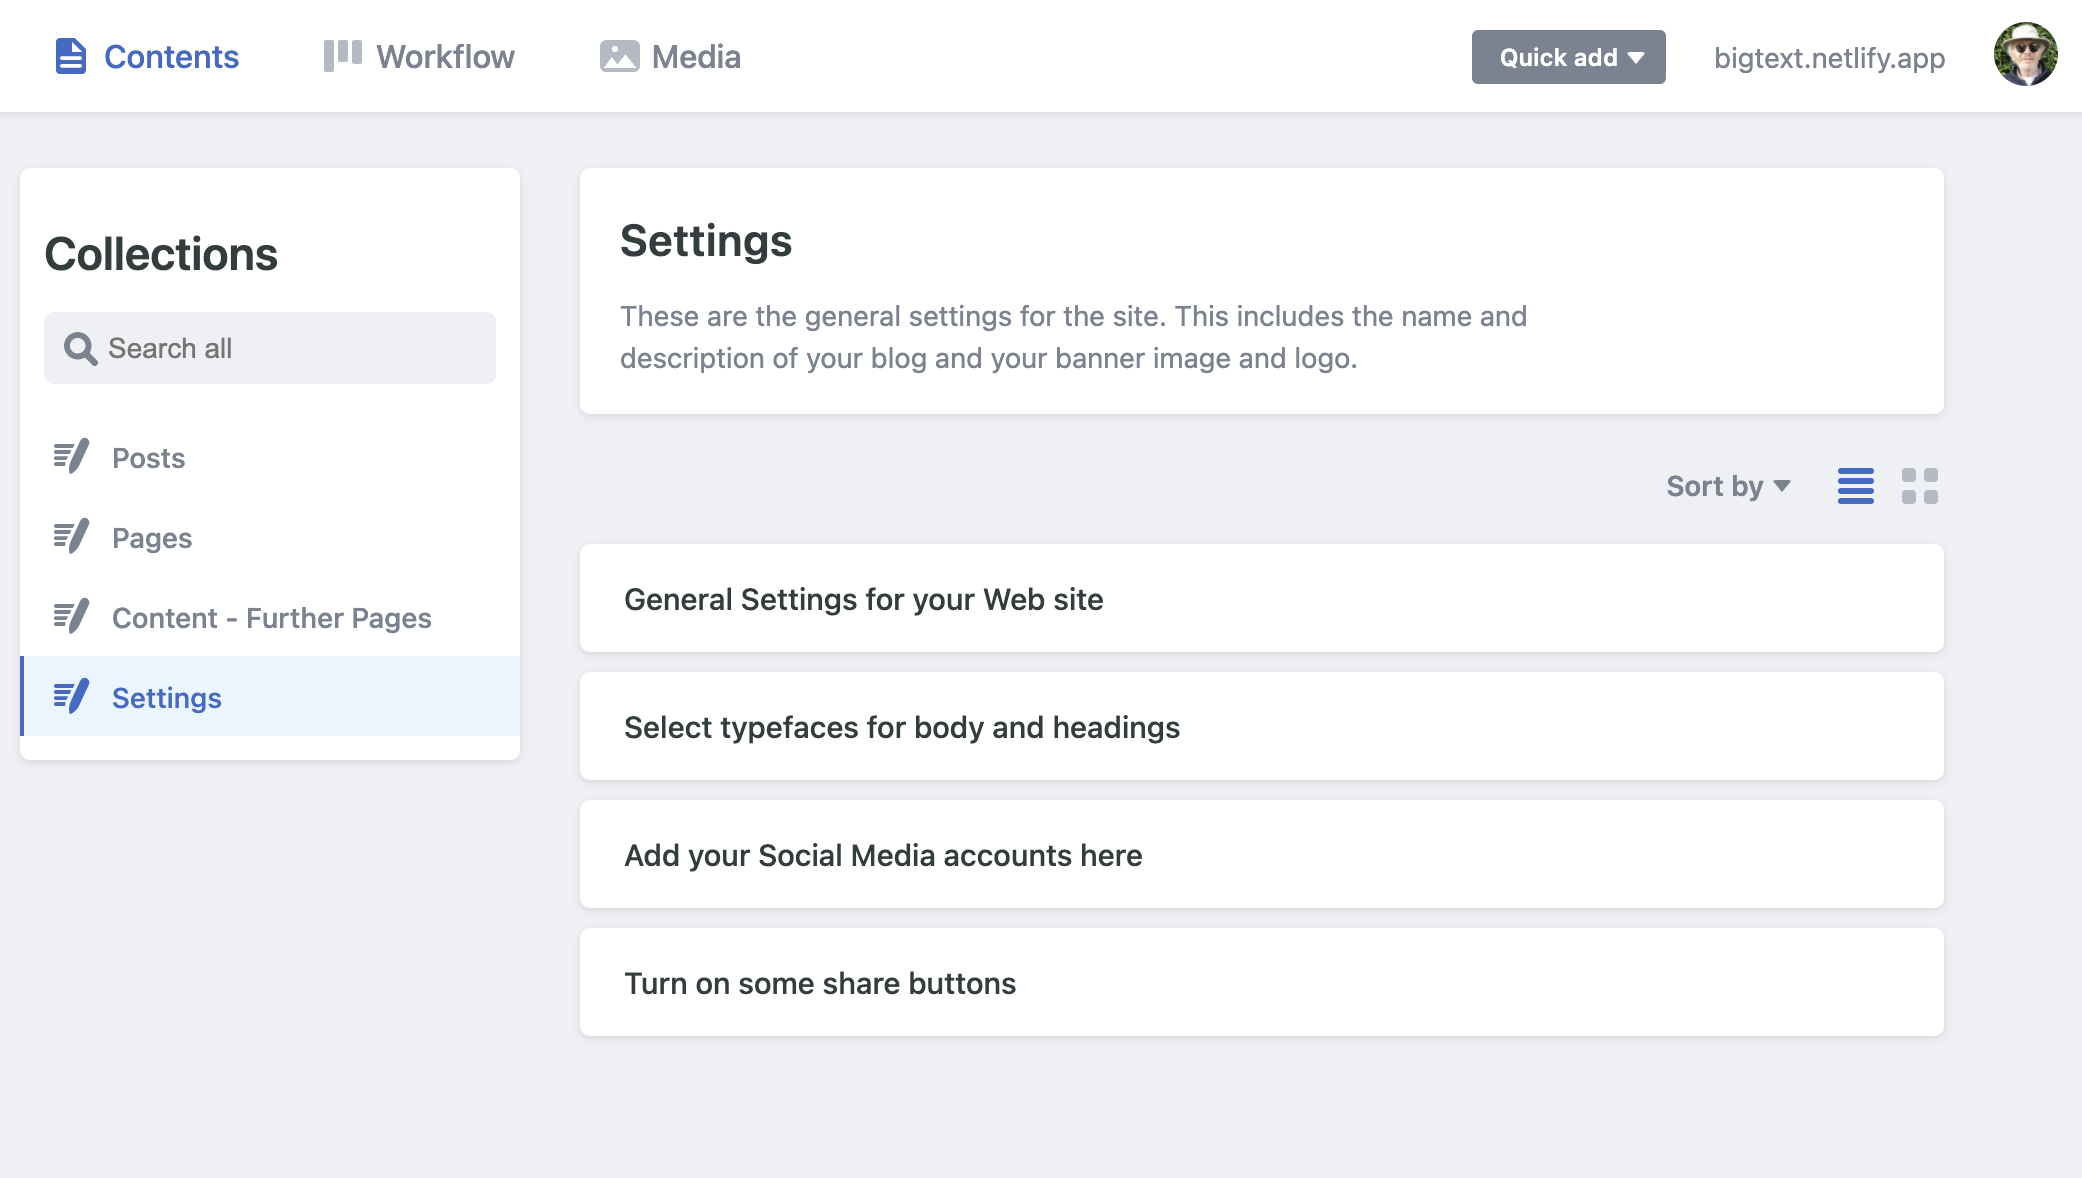
Once these changes have been made in Github, you can now go to your new site and begin to add some further details through the CMS.
At the top right in the navigation bar of your site you should see a pencil icon. Click this and after authenticating (just for one time) you should then see the editor user interface. You need to select the item labelled Settings under the Collections heading on the left. The important settings are found under the General Settings for your web site heading. Go ahead and dig into here, because this is where you name your site and put in the banner image and logo. You will come back this, but right now you need to understand how the changes are saves and published.
Saving and Publishing
When adding or editing any content through the CMS you will see the Save button in the control bar at the top of the editor page. This will save the new entry or setting but it will not be published to the web site yet. To confirm the change, you need to Set Status to Ready and then use the Publish button. For the Settings, this isn’t very useful, but when you are posting a new article to your blog, you can save and then come back later to finish the article before finalising. You will notice a View Preview link; this gives you the ability to see the post before it goes live to your site.
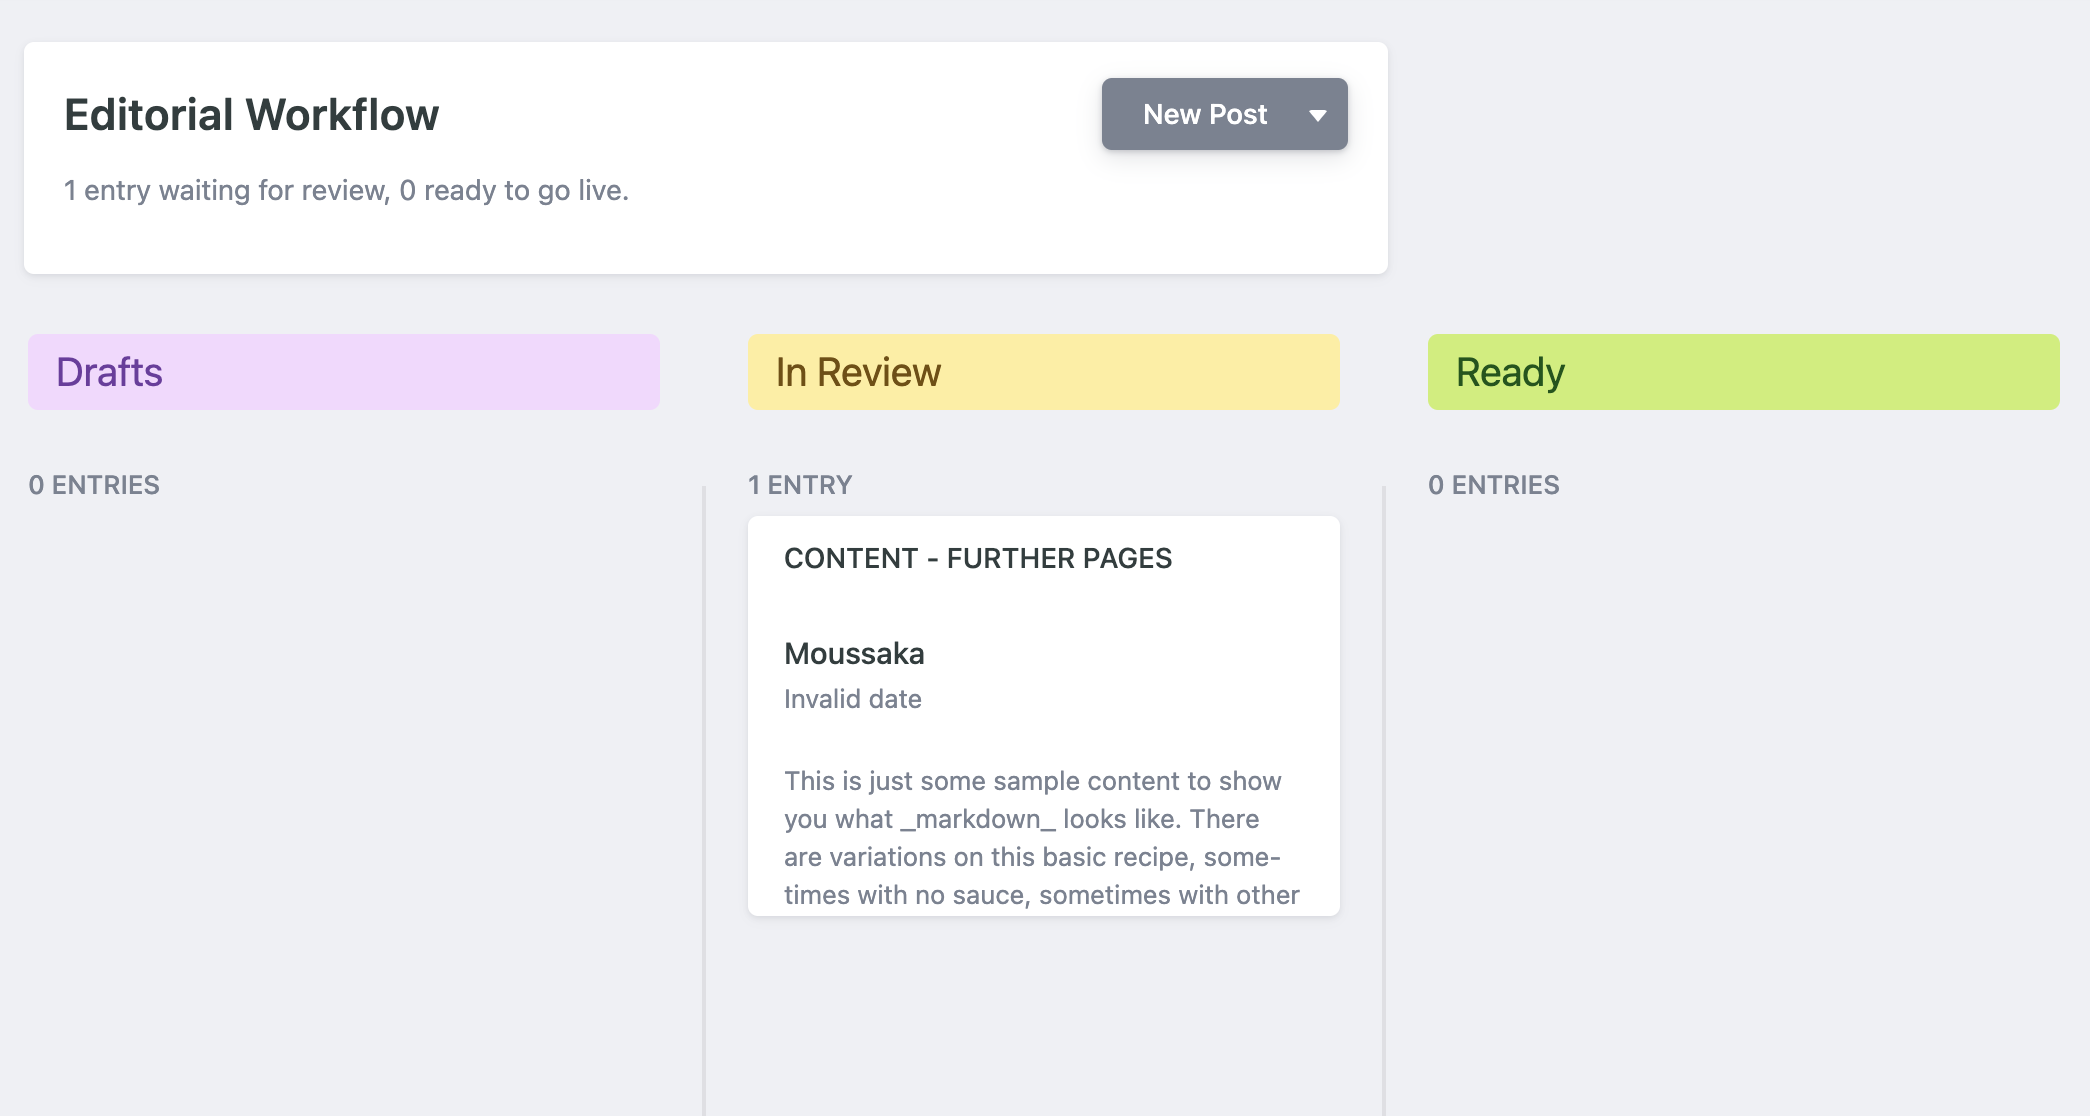
Workflow
When changes have been made you will see a Workflow item in the top bar. From here you can see items that are Draft, In Review or Ready. The interface allows for you to drag the items across to make those changes.
The Settings
The settings available are self explanatory, so it would be wise to try these things and see what changes are made. be aware that it does take up to 10 minutes for changes to work their way through to the live site.
Filed under: Web, HTML
This page last edited on: 2020-11-24